Install Windows 11 (or 10) on external SSD with Boot Camp — Big Sur (11.1) UPDATE 09/2021

There are a few guides out there that describe this process, but I could not find one that was applicable to current MacOS versions and hardware.
I’m the lucky owner of a 2019 16-inch MacBook Pro, and I finally got Windows 10 to work on an external drive (HDD in my case, but the instructions should work just as well for an SSD).
Update 09/2021: I just tried installing Windows 11 using the same method and it worked flawlessly. I used an SSD in an external enclosure, the speed is amazingly like an “internal” installation.
A few notes:
- Image Used: Windows11_InsiderPreview_Client_x64_en-us_22000.iso
- Does not work with an M1 Processor
- I was getting an “Inaccessible Boot Device” message when Windows started up, the problem was that the drive was connected via a USB hub. Plugged it in directly and it worked.
- After installation and the first boot, you can and should run many updates (Windows Update, Apple Software Update (bootcamp), AMD Pro Update if you have a Radeon card).
- My Thunderbolt Hub (CalDigi) does not work as the drivers do not seem to work yet, they install but give an error in Device Manager.
Update 01/2021: I never imagined how many people out there were interested in this article. Thanks for all the input and comments, and my sincerest apologies for not being able to respond and update as I would have liked.
Some changes in this version:
- Works with Big Sur aka MacOS 11.1. Thanks to David Anderson (@David Anderson) for helping people out and providing this insight.
- Includes steps to integrate BootCamp drivers required for out-of-the-box keyboard, touchpad, display, and network support.
- Clarification of some steps
Prerequisites
- 1 external device (4 GB USB stick is fine) for the Apple Boot Camp Software
- 1 external SDD/HDD with a minimum of 256 GB of storage
- Backup all files on both devices since they need to be reformatted
- Windows 10 or 11 ISO and license
- Be willing to loosen some of the MacOS security settings. This will be necessary for any Mac equipped with a T2 chip.
- About 30–60 minutes to spare
- EASY-MODE: USB keyboard and mouse (this guide includes steps to integrate the drivers to make external peripherals optional, but by connecting an external keyboard and mouse, you can skip these additional steps)
Preparing the USB stick (Support Software)
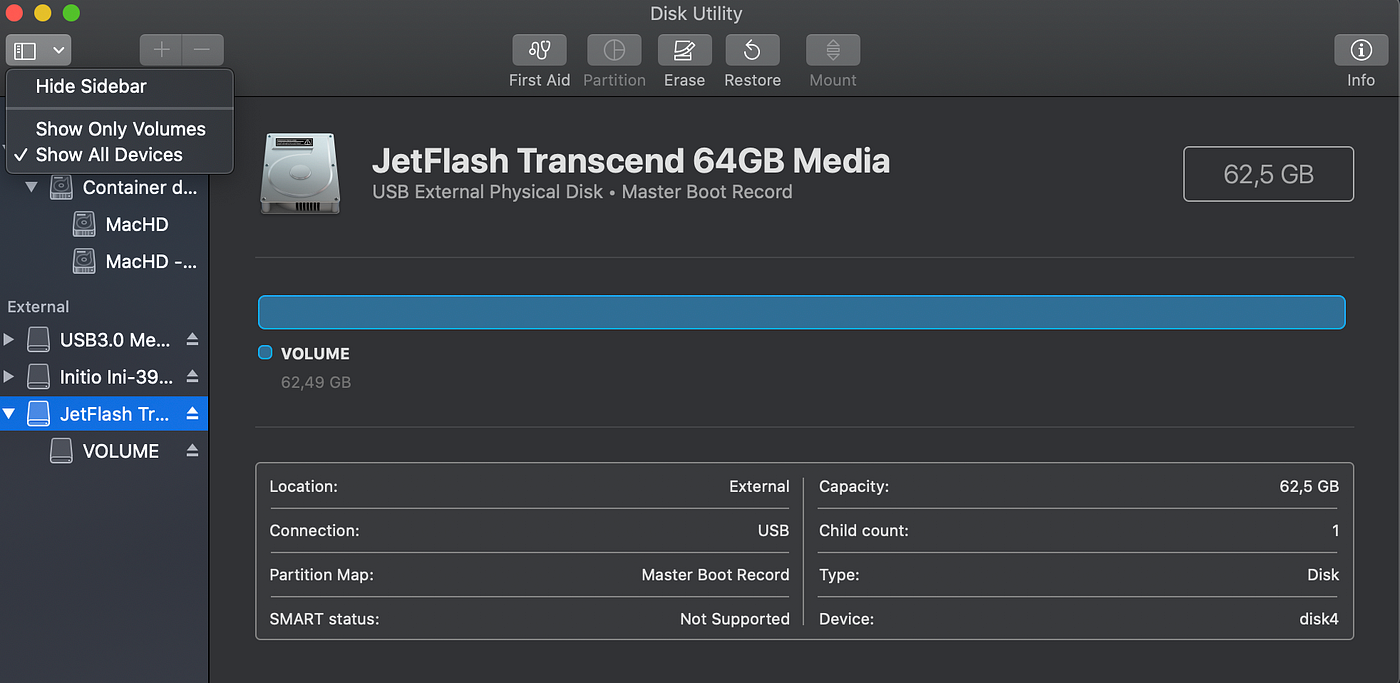
Open Disk Utility and select the USB stick on the left. In order to see all the options and to be able to select the device directly instead of the partitions, you may need to activate the advanced view by clicking on (you guessed it) View.
Select the drive and click Erase.
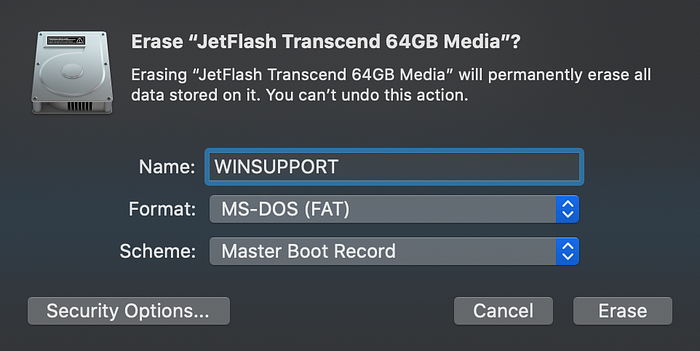
Select the options in the image to start the process (all device data will be lost).
Now start the Boot Camp Wizard and select Action from the menu bar, then Download Windows Support Software.
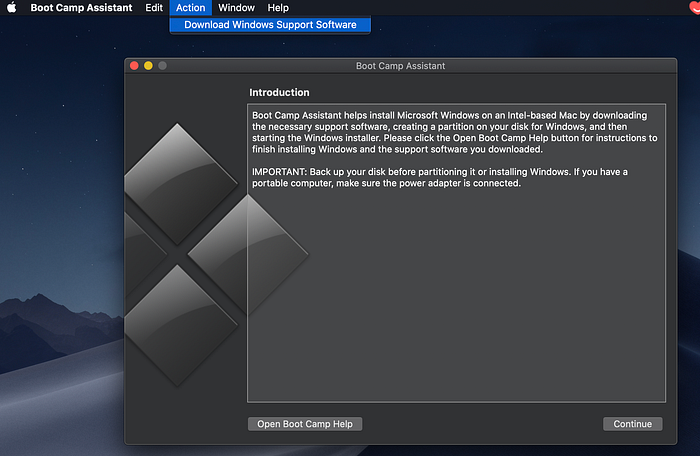
Follow the instructions and download the support software to the USB stick. Done for now, put it aside for later.
Installing VirtualBox
We will use VirtualBox to install Windows (inside MacOS). The software is free (and great)!
Download and install the latest package. After that, we are ready to continue.
Clarification: We use VirtualBox to compensate for the lack of a physical computer running Windows. We are not using the virtual machine for anything other than the installation process, and it can be uninstalled from MacOS when everything is done. The end product will be Windows running natively on your Mac from an external drive.
Preparing the USB HDD/SSD Windows 10 Drive
Now to the main drive. This is where the older guides diverge. Connect the drive and go back to Disk Utility.
Select the drive in the same way as you did with the USB flash drive and click Erase. Now select instead:

Open a Terminal window and type…
diskutil list
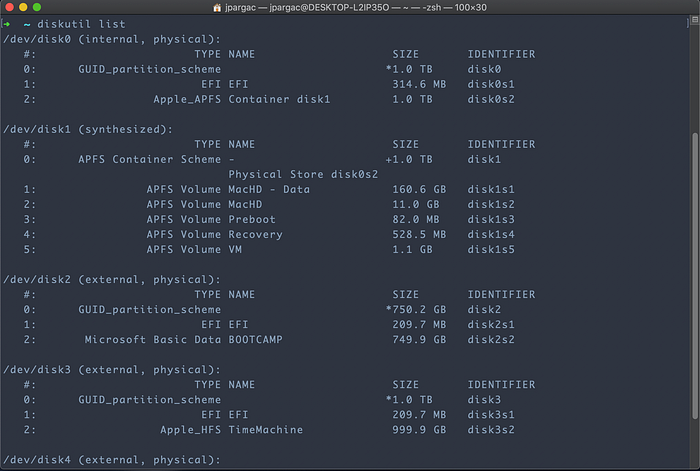
For the sake of this article, I will use disk2 and trust you to change the drive number according to your setup.
Next, use Disk Utility or the Finder to unmount/eject the newly formatted drive, but leave it physically attached, of course.
sudo VBoxManage internalcommands createrawvmdk -filename bootcamp.vmdk -rawdisk /dev/disk2
The above command creates a drive reference for VirtualBox that points to the SSD/HDD we prepared for the installation earlier.
NOTE: This command will fail if you forgot to eject the drive before.
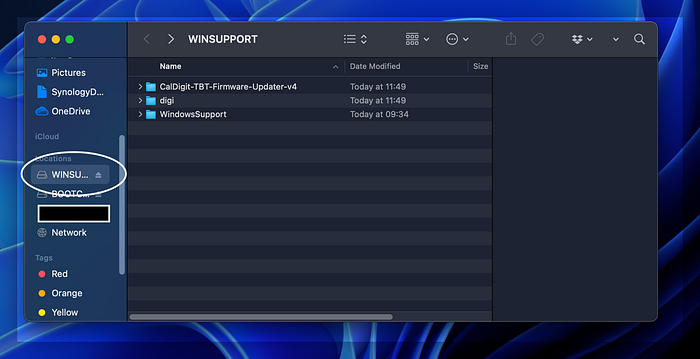
When the command is complete, a new file named bootcamp.vmdk will be created in your home directory.
!! This usually mounts the drive again, so unmount it again using the Finder!!
Preparing the Windows ISO File and integrate the BootCamp Drivers directly (optional).
During the setup process, I recommend doing this so that your keyboard, touchpad, screen, and network will work immediately.
Installation with VirtualBox
Next, start VirtualBox with admin rights
sudo /Applications/VirtualBox.app/Contents/MacOS/VirtualBox
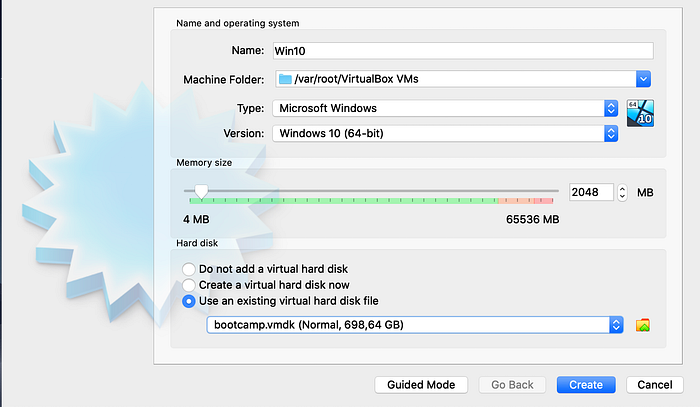
Select New and set up the virtual machine by selecting the bootcamp.vmdk file you created earlier (if it looks different, click Expert Mode).
Another important step follows. To boot from the drive, we need to install Windows in UEFI mode. Select the virtual machine and go to Preferences.
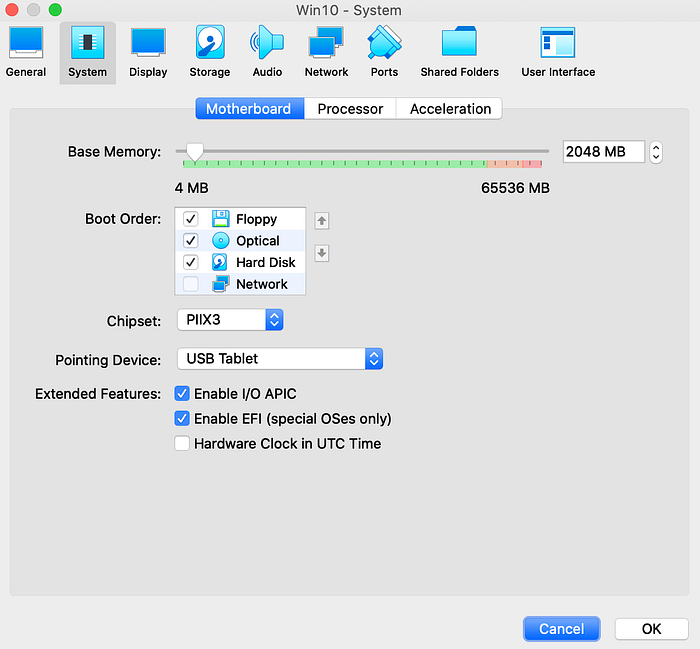
Select Enable EFI (special OSes only).
In addition, you will need to mount the Windows 10 ISO file to your virtual machine.

You can get a current ISO here:
or
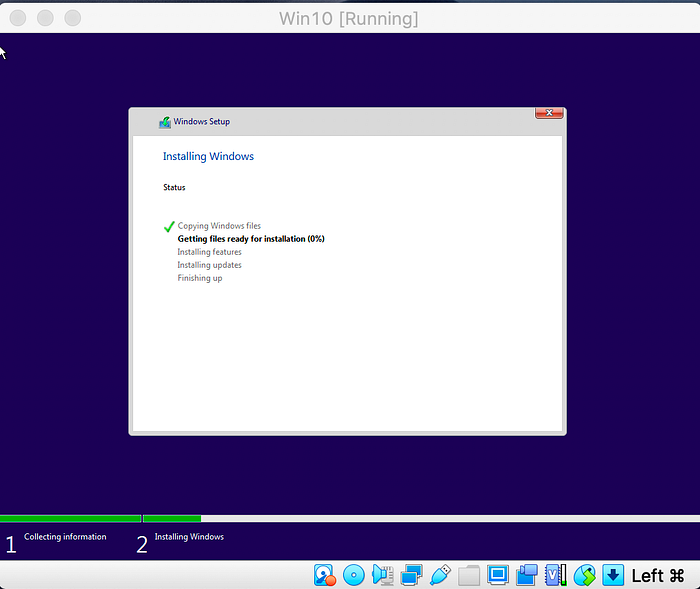
Now we are ready to start the virtual machine. Important: You must press a key to load from the CD as soon as the virtual machine starts, otherwise you will end up in a terminal shell and have to start the boot process again. (Thanks for the hint @Onur Ozan Yüksel)
The Windows Installer screen should appear. Follow the instructions and choose Custom Installation. When the drive selection screen appears, you will need to format the second partition. It will probably still warn you that Windows can’t be installed, but you can safely ignore that. (If you get stuck here, make sure you’ve enabled EFI mode for your virtual machine, see above).

Let the installation routine do its thing, but be on your toes!
IMPORTANT: Once the installation is complete, you have about 10 seconds before Windows restarts. This must not happen, otherwise you’ll have to do all steps again.
Click on the X and shut down the virtual machine (last option). While this is time critical, 10 seconds is more than cool (took me 2 seconds). Close VirtualBox, you are done with this step!
Boot from the drive and complete the installation.
Now we are ready to boot from the drive. Restart your Mac and press the Option key right after the Apple logo appears. This will take you to the boot disk selection screen. (https://support.apple.com/en-hk/HT202796)
The drive you are looking for is labeled EFI. Try booting from it first.
I could not boot from this drive with Catalina’s default security settings (Secure Boot, https://support.apple.com/en-me/HT208330).
I had to decrease the Security level (No Security) and allow booting from external media. The linked article above lists the steps:
- Turn on your Mac, then press and hold Command (⌘)-R immediately after you see the Apple logo to start up from MacOS Recovery.
- When you see the MacOS Utilities window, choose Utilities > Startup Security Utility from the menu bar.
- When you’re asked to authenticate, click Enter MacOS Password, then choose an administrator account and enter its password.

I understand that this may be a problem for you, but I could not get this to work any other way. I could not increase the security level after the installation was complete (let me know if you know how to do this). I recommend setting a firmware password as an additional layer of security.
After changing this, you should be able to complete the installation process by booting from the EFI disk.
IF YOU SKIPPED THE DRIVER INTEGRATION STEP ABOVE: You probably need to do an offline installation first. I had to plug in a USB keyboard and mouse until the installation was complete, including the Boot Camp support software.
Install Boot Camp Support Software
I recommend doing this, even if you have already integrated the drivers. Once Windows has started, you can plug in the USB drive you prepared earlier and install the Boot Camp software. This should get all of your hardware working properly, and you can get online, update, and live happily ever after.
Please refer to this document in order to switch back and forth between Windows and MacOS in the future.
I hope this has worked out for you!
